 For the past few months I have been watching my sugar intake and I noticed that all of the commercially available beef jerky packages that I find list sugar in some form as an ingredient. I am not sure why it is that everyone adds sugar to their jerky (I see it in most jerky recipes as well) but I dislike the sweet flavor. Here is my version without sugar or sweeteners. The look and color will vary depending on what meat you use, how thick you cut it, and how long you marinate it and dry it. Hope you like it.
Ingredients
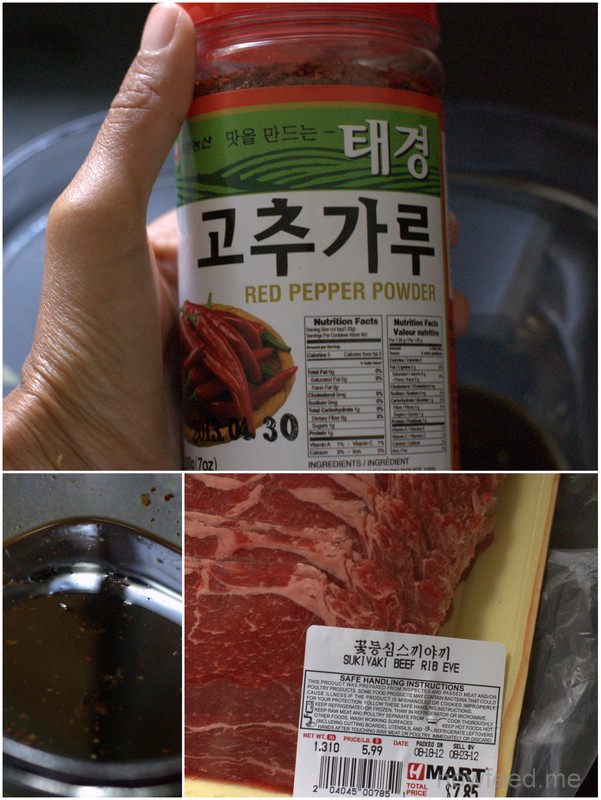
1.3 lbs beef, thinly sliced
1/3 cup tamari (soy sauce)
1 clove garlic, minced
1 tsp Worcestershire
1 tsp liquid smoke
1/2 tsp korean red pepper or cayenne (or to taste)
1 gallon ziploc bag
Preparation and Cooking
Slice the beef into slices just under 1/4 inch thick. Partially freezing the beef will make it easier to slice into even slices. In a ziploc bag, pour in the soy sauce and remaining ingredients except the beef. Seal the bag and shake to mix all the ingredients together. Add the beef to the bag then seal the bag squeezing out most of the air. Gently massage the bag to get the marinade between all the slices and to cover all the beef. Refrigerate for 4 hours, or overnight if preparing the day before.
Food dehydrator method:
When ready to dehydrate, remove the meat from the bag and pat the slices dry with paper towel. Lay the slices on the racks of the food dehydrator taking care to make sure the meat is in single layers and not overlapping. Dry according to the directions included with the dehydrator, usually between 12 to 20 hours. The temperature, air circulation, and thickness of the meat will determine how long the drying process takes.
Oven method:
If using the oven lay the slices on a baking rack over a baking sheet to catch any drippings. Set the oven to about 140 degrees fahrenheit – or the lowest setting if it doesn’t go that low, place the baking sheet in the oven, and leave the door cracked open. Dry for about 6-8 hours.
Notes:
- To simplify this recipe you can leave out the Worcestershire sauce and the liquid smoke, and even the cayenne if you do not like spicy foods.
- You can use regular soy sauce if wheat and organic are not a concern to you, though I used organic gluten-free tamari.
- Other drying methods which I have not tried but have seen or read about are using a smoker – in which case you definitely would leave out the liquid smoke, and a dry box, where you dry in full sun. I would definitely try the dry box method if we had enough sun and heat where we live, but unfortunately that is not possible.


